Started to do some extra animation work when not doing my university project.
This is a simple walk cycle I made using a pre-rigged model available here: http://www.creativecrash.com/maya/downloads/ultimate-bony
This being my first ever attempt at animating a walk cycle or doing any animating in Maya, there are some details that will need work on to improve them, however I am happy with the general result.

Tuesday, 15 January 2013
Tuesday, 8 January 2013
In The Style Of - Final Idea and Character Designs
Whilst not having posted anything over Christmas I have made good progress with my latest university project.
The project titled 'In the Style Of'' requires me to produce a 1 minute promotional trailer for a revamped version of a children's cartoon in one of three styles.
The choice of cartoons were: -Paddington Bear;
-Teenage Mutant Ninja Turtles; and
-Teenage Mutant Ninja Turtles; and
-Roobarb and Custard.
Having the least knowledge and personal experience with Roobarb and Custard I decided to choose this one as it meant I could approach it in an unbiased manner and focus purely on what I found in my research.

The styles we could choose one were based on animations produced by Studio AKA and Passion Pictures.
-The Lost Thing
-Lost and Found
-Varmints
Of the three styles I loved the look and feel of 'Lost and Found' by Studio AKA.
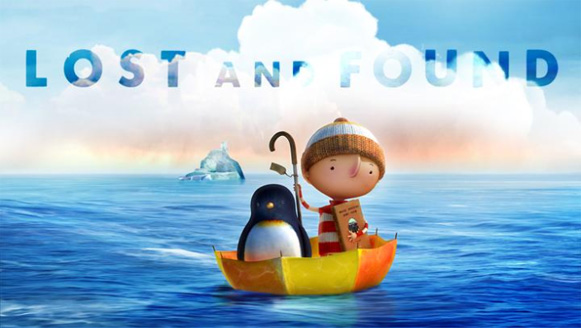
The bright colour tones and painterly look makes some of the scenes really vibrant and the general emotive way the music and story work together drew me towards in when I was choosing.
Whilst the visual style might not be as abstract as the other two options I like the fact nothing has straight lines in a scene and each element has its own unusual look to it that takes it away from fitting into the normal world.
With both initial choices made and research into them completed I did a lot of deciding for a suitable story or route for my animation to take. Originally working with the concept of having both the dog and cat characters with a much more humanoid look to them, designing them with this in mind.

Even though I liked the look this character had to him and felt he was very defined, after furthering a suitable story line I had to redesign my characters with them being quadrupeds having my story being a prologue to the cartoons of Roobarb and Custard being a puppy and kitten.


New character designs with them as quadrupeds.
Initial Model of Roobarb Character


Wednesday, 14 November 2012
Steampunk Project - Complete
With the deadline just a couple of days away I have finished my first second year university project with time to spare.
Even though this was my first foray into 3D animation I am extremely pleased with my finished result as well as astounded at the ease with which I was able to animate after laying all of the groundwork and rigging my character.
Having entered my second year unsure of a more specific area of the industry I wanted to head towards, I am much more confident after completing this project that animation is definitely something I could easily see myself continuing with in the future.
Whilst I find some parts of the animation pipeline tedious or time consuming I understand their importance as well as how having one aspect of an animation be weaker than the rest can still bring down the entire piece.
I can say without a doubt that the most enjoyable part of this project for me was the animating and bringing the model I had made to life with the simplest of movements.
Here is my completed animation.
Wednesday, 31 October 2012
Steampunk Project Progress
Over the last week I have put the majority of my time into my website project with that having a much sooner deadline, but with that now finished I have jumped right back in to 3DS Max and got back to work on my robot.
I am now at the stage where my robot is almost complete with both arms rigged and just some final touches and finger attributes needed to be added to the left arm.
One adjustment I have made to my design was the left arm. After looking at more of the video tutorials provided and experimenting with some rigging myself I have altered my left arm from have two sections, an upper and lower, to three, giving it much more flexibility and possibilities when it comes to the animating.


As well as finishing of my main robot I have almost produced its opponent, a simple damaged hand robot.
The main challenge that this robot will produce is animating it. I intend it to walk on its fingers with the wrist and lower arm section that remains positioned vertically above it, similar to 'The Thing' from Addams Family.
To get it much more smoother animation effect and more control over it I have given each finger an IK solver that will let me pose it and move it in a much more precise manner, over applying standard attributes like the main robots fingers.
Below is a quick test to see how it looks animated and planning out timing for how it shall move around.
Monday, 29 October 2012
New Site!!
As part of a university project I was required to set up an online portfolio for employers and to have a stable online presence for future needs.
With that in mind I have purchased both a domain and web hosting to have a fully operational website.
Whilst a large amount of it is temporary and subject to change I am really happy with this step and more so because I hand coded the vast majority of the site in Dreamweaver, using some online guides for JavaScript and certain features that I wanted to achieve. I feel much more happier now that as my portfolio grows through more university projects and personal work, I will have a hub where all of this can be stored and that also links to the rest of my accounts.
So without further ado I present : nickrood.co.uk
Wednesday, 17 October 2012
Steampunk Robot Shoulder Joint Experimentation
For my Steampunk robot project I have been looking at a lot of means for each element of it to connect to each other. After a number of sketches and different ideas being tossed around I looked at Portal 2, in particular the robot 'Atlas' for how his arms have been attached to his body.

His arms appear to be attached by a set of tubes or hydraulic pipes that would most likely allow it to recreate more realistic shoulder movement.
From this I decided to incorporate them into my own robot with it having pipes connecting to the arm that would both allow for a realistic movement as well as passing fuel or other product down the towards the arm if it were in fact a fully functional robot.

Upon deciding this I then had to work out a way to animate this correctly with each of the pipes moving realistically with them deforming and flexing slightly like really pipes.
With some help I came across the hose tool which would allow me to make just what I had intended with each end of the hose being attached to a 'Point' helper object that would in turn be linked to the shoulder segment and body.
Having done this I produced a few viewport grabs to ensure it worked correctly and gave the intended look.
Even though I am happy with the final result I intend to still experiment with a more effective way of creating this effect, looking into what I can achieve with linking and other tools.
Saturday, 13 October 2012
Steampunk Chess Robot Project - Iterative Development
Over the past two weeks for this project I believe I have organised my work in a way that will benefit my work for it later on. In past projects I have been keen to jump on the software and get modelling or have one idea I love that clouds my vision of any other possibilities.


With this project however I have took an aspect preached to us in the first year of university to heart - 'Iterative Development'.
Rather than like previously where I ran with a single idea, I have considered several different ones and sketched out simple designs that showed the concept I was going for. I don't think it was until the end of the first week that I actually opened up 3Ds Max and began modelling an idea and for this I am pleased.
Whilst I don't have as much solid progress to show in the form of models and the like, I am highly confident in the stage I am currently at and am comfortable enough with the software that I will be able to produce my final model quickly using reference from sketches I have done and inspiration images I have gathered.
There were a several different aspects I had to consider when designing my robot character including its size and how it would move.
Through toying with different ideas my final idea is to have a character suspended from a rail that it can move along similar to 'Wheatley' from Portal 2, with large bulky arms that hang down below it and are heavy for it to lift, and a cage like body that has metal plates over it with some of the internal mechanisms exposed, adding more detail to it.

Simple sketch similar in style to tutors example.

Sketch considering a design for robot hand with 'furnace' and vents on back of palm.

Idea for exhaust vents or chimneys to be located on the robot.

More detailed sketch of a static arm incorporating the hand design and other steampunk elements.

Robot with body with an arm reaching over the top, back exhaust pipes, and exposed front mechanisms.

More complex design for a robot with an arm that extends out of side panels, switching between each side for each move. Exposed front mechanisms and back exhausts incorporated as well.

First suspended robot drawing.

Much more advanced suspended robot drawing incorporating several previous design elements.
Subscribe to:
Comments (Atom)